The 30 Day Blueprint for Your Acupressure Progression
Most people try an acupressure mat once, wince at the sharp sensation, and never pick it up again. That is the wrong approach entirely.
Spike therapy is not a one-session fix. It is a journey that requires a deliberate, step-by-step acupressure progression. Just like building strength in the gym, your body needs time to adapt, open up, and unlock the deep relief this tool is genuinely capable of delivering. When you follow a structured plan, the results are transformative.
This 30 day blueprint breaks the process into three clear phases. Each phase builds directly on the last. By managing your acclimation properly, you will end the month lying comfortably on bare skin, melting away chronic muscle tension in deep, meditative sessions that most beginners cannot even imagine on day one.
Why Progression Matters: The Science Behind Spike Therapy
Before diving into the blueprint, it helps to understand what is actually happening inside your body when you commit to a structured acupressure progression.
The thousands of small plastic spikes apply localized pressure across your skin and soft tissue. This triggers three key physiological responses:
-
Rapid Blood Flow: The pressure causes your blood vessels to widen immediately, flooding tight muscles with fresh oxygen and nutrients.
-
Endorphin Release: Your nervous system registers the prickly sensation as a minor stressor and responds by releasing natural pain-relieving endorphins throughout your body.
-
Parasympathetic Shift: Within a few minutes, the initial intensity softens into a deep, spreading warmth. This signals your nervous system to fully exit fight-or-flight mode and drop into genuine recovery.
According to a clinical study archived by the National Institutes of Health, regular targeted acupressure application significantly calms overactive nerve pathways, helping individuals reduce persistent body tension while noticeably improving overall sleep quality.
The catch is that none of these benefits are fully accessible on day one. Your nervous system needs repetition to stop treating the spikes as a threat and start using them as a recovery tool. That is exactly what this 30 day blueprint is designed to do.
Phase 1: The Acclimation Period (Days 1–7)
-
Setup: Mat on your bed or mattress, wearing a thin cotton t-shirt.
-
Session Length: Work up to 10 minutes per session.
Your only goal this week is to learn how to use an acupressure mat comfortably enough to stay on the spikes without the urge to jump off. Nothing more.
Step 1: Wear a Thin T-Shirt
Do not place bare skin on the mat yet. A plain cotton t-shirt acts as a light barrier that dulls the sharpness just enough to let your nervous system settle. As the days pass you will notice the sensation becoming more manageable. That is your body adapting.
Step 2: Choose a Soft Surface
Place the mat on a mattress or plush surface for the entire first week. The softness absorbs a portion of your body weight, keeping the spike pressure mild and accessible. Hard floors come later.
Step 3: Lower Yourself Down Slowly
Never drop your weight onto the mat. Sit at the base with your knees bent, place both hands on the floor beside you, and lower your torso one inch at a time. Distribute your weight evenly so no single area bears the full pressure.
Step 4: Breathe Through the Sensation
Your body’s instinct is to freeze and tense up. Do the opposite. Close your eyes and breathe in slowly through your nose for four counts, then exhale fully through your mouth for six counts. Deep, deliberate breathing deactivates your stress response and allows your muscles to soften into the spikes rather than fight against them.
By day 7, reaching 10 minutes without discomfort is your green light to advance your routine.
Phase 2: The Transition Window (Days 8–21)
-
Setup: Mat on your bed or a thick rug, switching to bare skin by day 14.
-
Session Length: Build toward 20 minutes per session.
This is where the real work begins. You are no longer just tolerating the mat—your acupressure progression is officially shifting gears.
Step 5: Target Your Neck and Lower Back Curves
Flat mats often fail to make full contact with the natural curves of your cervical spine and lumbar arch. Roll a small towel and place it underneath the mat at your lower back. For your neck, use a dedicated ergonomic acupressure pillow to cradle the base of your skull. Full contact across your entire spine is what produces lasting relief from back stiffness.
Step 6: Transition to Bare Skin
Around day 10 to 14, try removing the t-shirt. The intensity will increase noticeably, but your nervous system is now primed to handle it. The heat wave sensation you feel spreading across your back is blood circulation at work. That warmth is the goal. Ride it.
By the end of week three, 20 minute sessions on bare skin should feel deeply relaxing rather than intense.
Phase 3: Deep Tissue Mastery (Days 22–30)
-
Setup: Mat directly on a hard floor, bare skin contact.
-
Session Length: 20 to 30 minutes of deep, meditative relaxation.
You have done the work to build tolerance. Now you reap the reward.
Moving the mat from a soft surface to a hard floor marks the final peak of your acupressure progression. It dramatically increases the depth of pressure. Your full body weight now presses into the spikes without any cushioning to soften it. This is where deep tissue relief, genuine muscle melting, and meditative stillness become possible.
Spend the final phase exploring stillness. Stay completely motionless. Let your breath slow. Allow your back to sink further into the mat with each exhale. This is no longer about enduring. This is recovery at its most effective.
Mistakes That Will Stall Your Progress
-
Moving Around on the Spikes: Do not drag or shift your body across the mat. Sliding aggressively can scratch the skin. If you need to reposition, lift straight up and reset.
-
Skipping Days: Consistency is what dictates a successful acupressure progression. Missing several days in a row resets your nervous system’s adaptation partially. Even five minutes on an off day keeps the momentum moving.
-
Using the Mat on Damaged Skin: Avoid the mat entirely if you have open wounds, severe sunburns, or raised skin conditions along your spine.
-
Stretching Cold Right After: Let the blood flow stabilize for two to three minutes before moving into stretches or mobility work. Your tissues are primed for movement after a session, but forcing range of motion immediately can strain warming muscles.
Maximizing Results: What to Do After Every Session
The acupressure mat is a powerful passive treatment. It works best as preparation for active movement.
Once your back is flooded with circulation and your chronic muscle tension has dropped, your tissues are perfectly primed for structural flexibility work. To take full advantage of this window, try following every mat session with our targeted 6 core exercises for back pain to strengthen the stabilizing muscles supporting your spine. Performing these movements on warm, loose tissue produces dramatically better results than cold stretching alone.
Think of the mat as the key that unlocks your body. Active movement is what walks you through the door.
Need Personalized Guidance? Contact Our Team
If you struggle with structural issues, have questions about your acupressure progression, or want tailored guidance on managing discomfort safely, please contact us today for direct, personalized assistance.
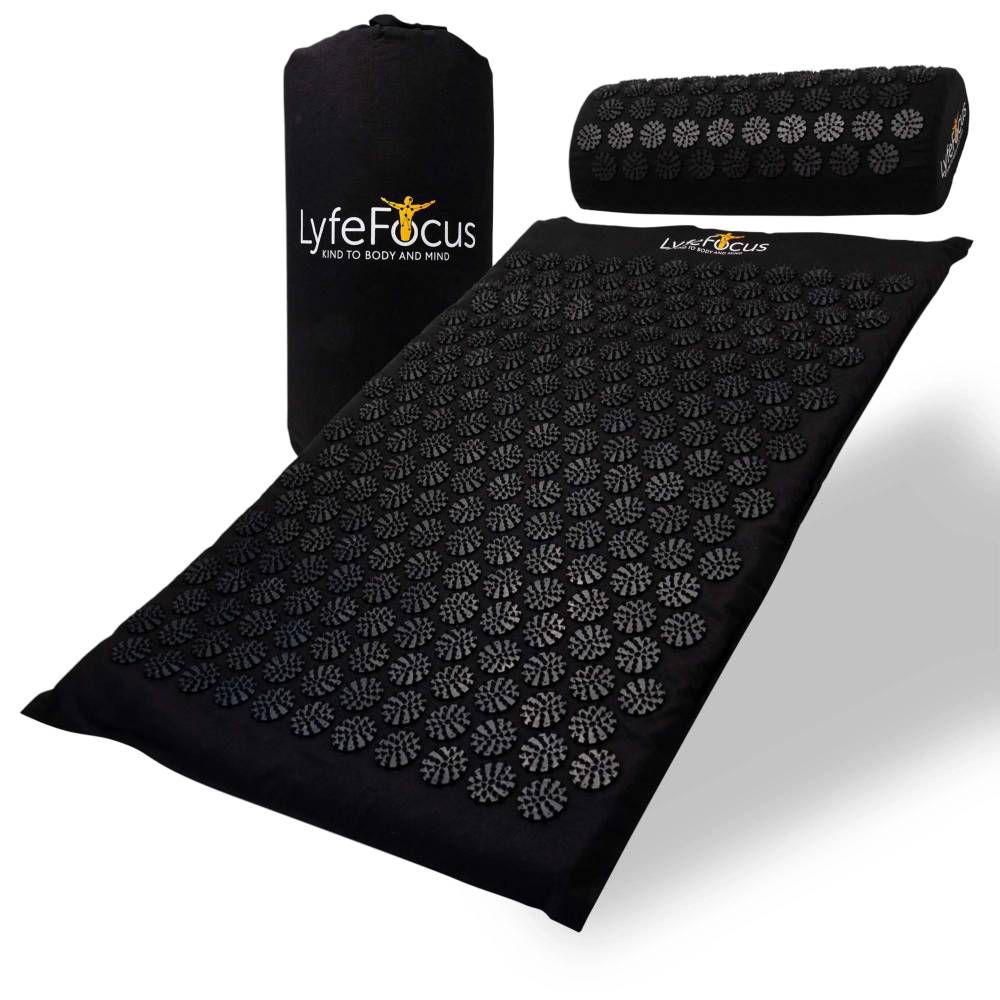
Acupressure Mat & Pillow (Black)
Relax your body and calm your mind with gentle acupressure relief.
Shop Now →